We are excited to announce interesting enhancements to WPLoyalty 1.2.4 – Birthday Email and Level Achievement Notification, Settings for display conditions (user role, user level, current and next user level), Minimum amount order goal conditions, Settings for birthday input field (one-time edit or multiple times), and Common settings for date format.
Birthday Email and Level Achievement Notification
Customers can now receive email notifications when they earn points or rewards on their birthdays and when they achieve a new level. You can customize email messages with shortcodes. Here is how you can achieve this:
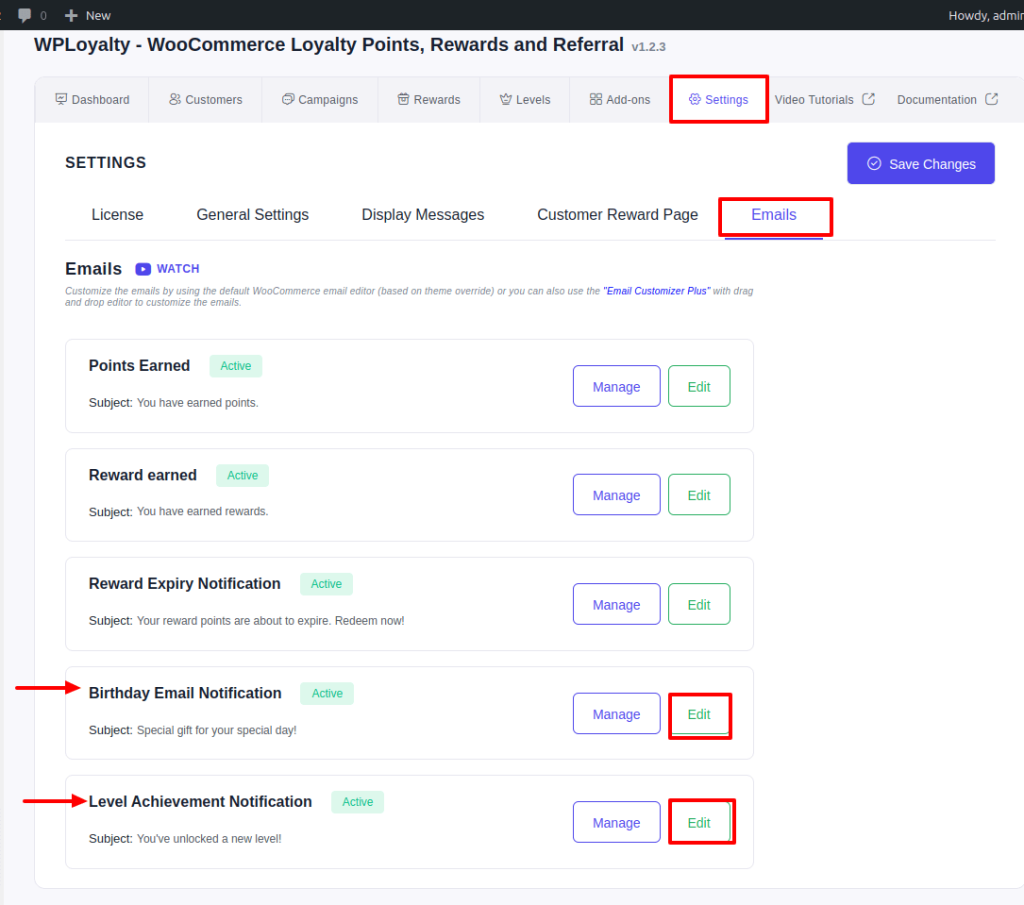
Step 1: To customize a message, visit WPLoyalty Dashboard -> Settings -> Emails -> Birthday Email Notification / Level Achievement Notification -> Edit.
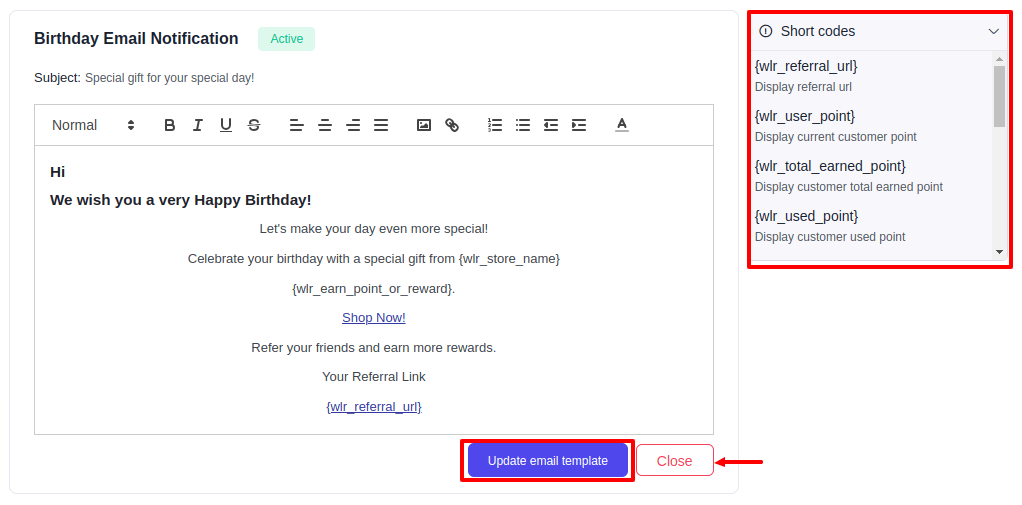
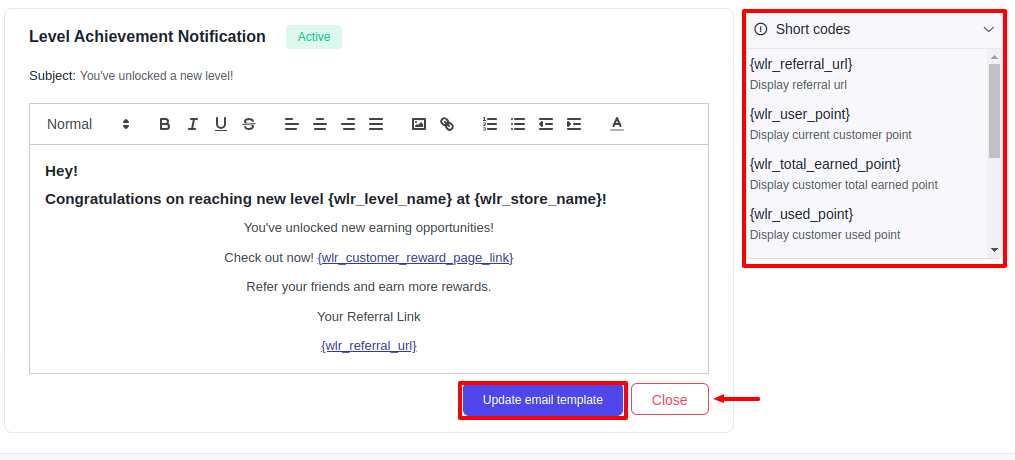
Step 2: You can now edit messages with shortcodes. After editing, Click “Update email template.”
For Birthday Email Notification:
For Level Achievement Notification:
Once all set, customers will receive email notifications about the points or rewards earned on their birthdays and when they achieve a new level.
Settings for display conditions (user role, user level, current and next user level)
This new update allows you to filter the earning opportunities based on selected conditions.
a) User role
If you set the condition to the “user role,” the earning opportunities are shown only to the user role you selected.
For example, if you select the user role as a “customer,” the earning opportunities are only shown to the customer.
Step 1: Set the earning opportunities condition to “User role.”
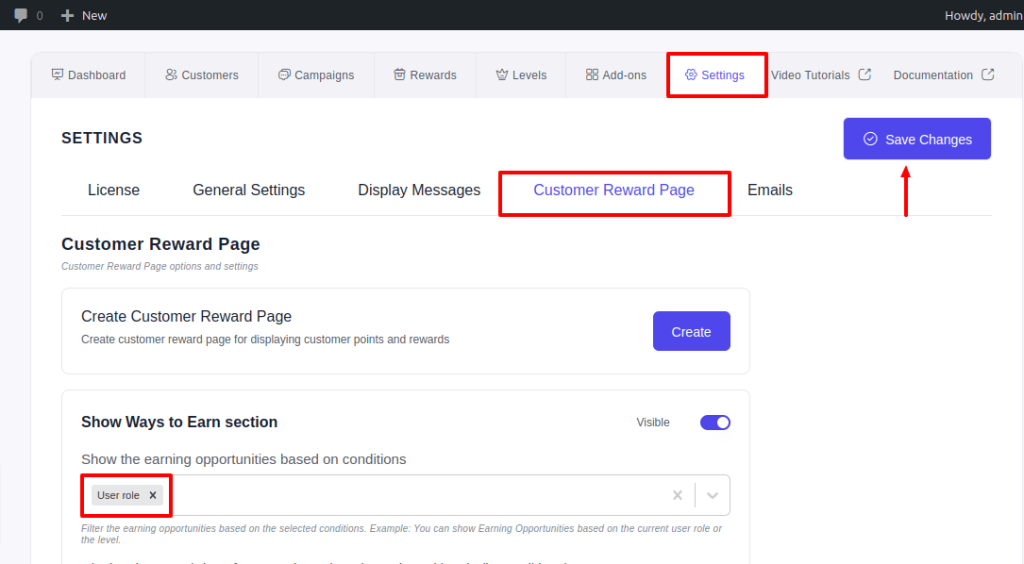
Step 2: Assume that you created a “Point for Purchase” campaign and the “Customer” user role is selected under the conditions. You can choose any user role from the list.
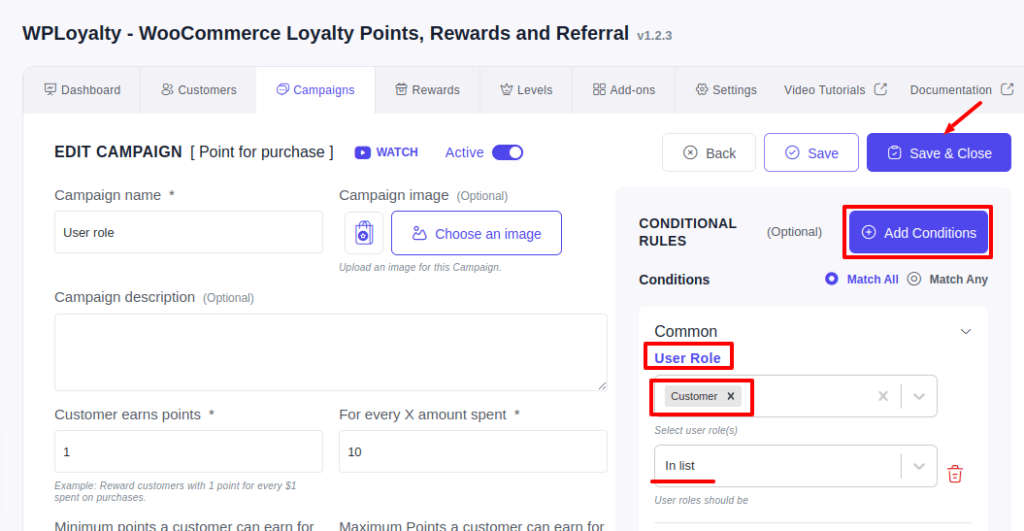
Once all set, the earning opportunities are shown only to the “customer.”
b) User level
If you set the condition to the “user level,” the earning opportunities are visible only to the selected user-level customers.
For example, assume you created a user level and named it “Silver.” If you select the user level condition to Silver, the earning opportunities are shown only to the Silver customers.
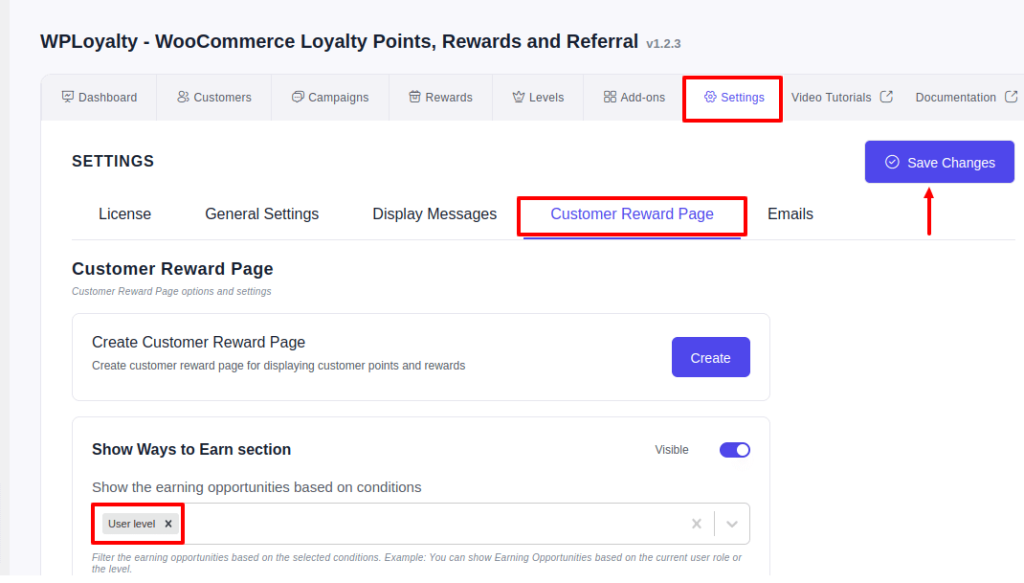
Step 1: Set the earning opportunities condition to “User level.”
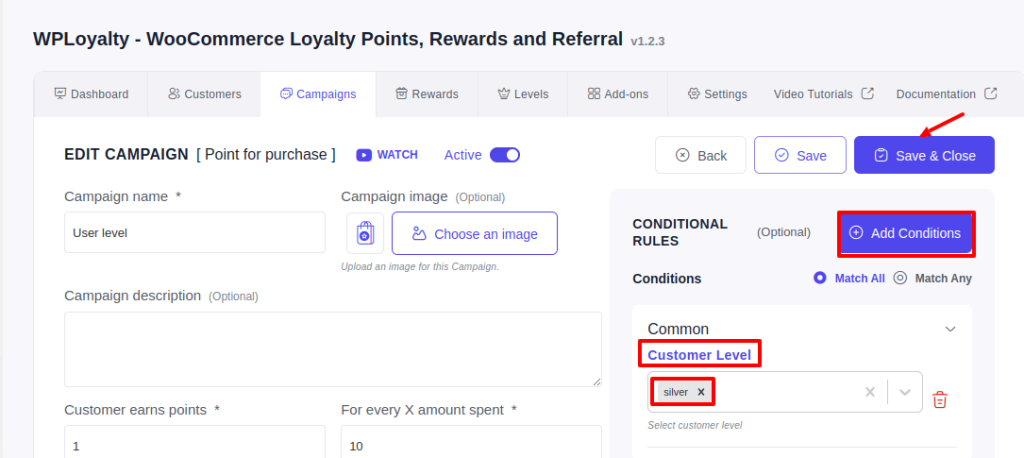
Step 2: Assume that you created a “Point for Purchase” campaign and the “Silver” customer level is selected under the conditions.
Once all set, the earning opportunities are shown only to the Silver-level customers.
c) Current and next user level
If you set the condition to the “current and next user level,” the earning opportunities are visible for current level plus those rewards that are available in the next level.
For example, assume that you created two levels: Silver and Gold.
- Silver level – Those who earned 1 to 500 points
- Gold level – Those who earned 501 to 1000 points
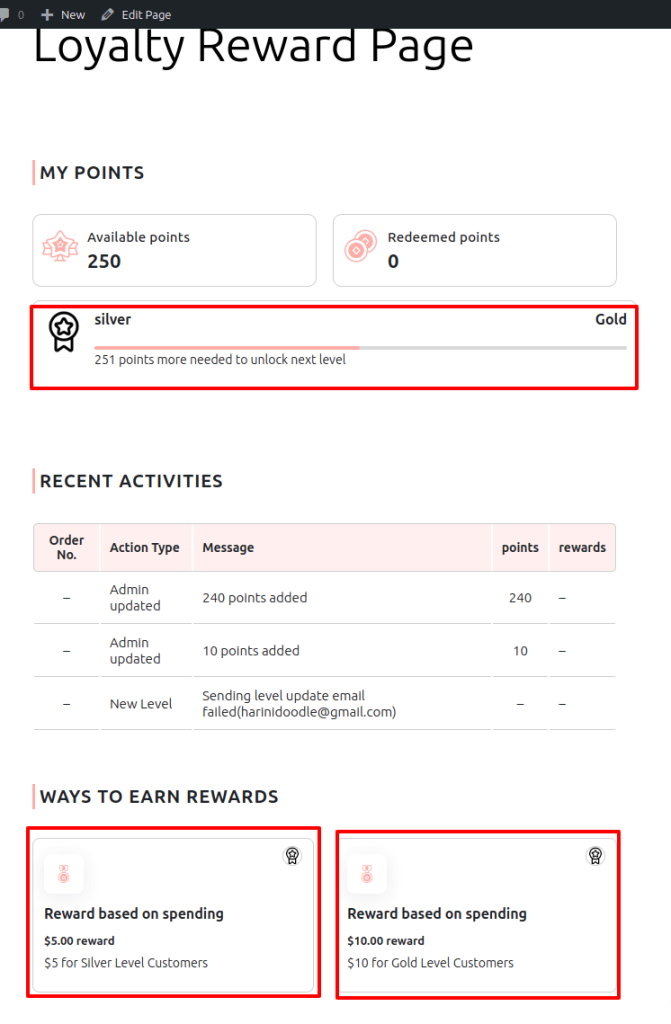
Now, earning opportunities are visible for current level plus those rewards that are available in the next level.
Minimum amount order goal conditions
We have added a new condition, “Number of orders with order value or count,” in the “Reward based on spending” campaign.
You can set conditions for the customer’s purchase history so that only eligible customers get rewarded through a “Reward based on spending” campaign.
Step 1: To set conditions, Visit WPLoyalty Dashboard -> Campaigns -> Create new campaign -> Reward based on spending. You can create a campaign and then click, Add Conditions -> “Number of orders with order value or count” under the “Purchase history” section.
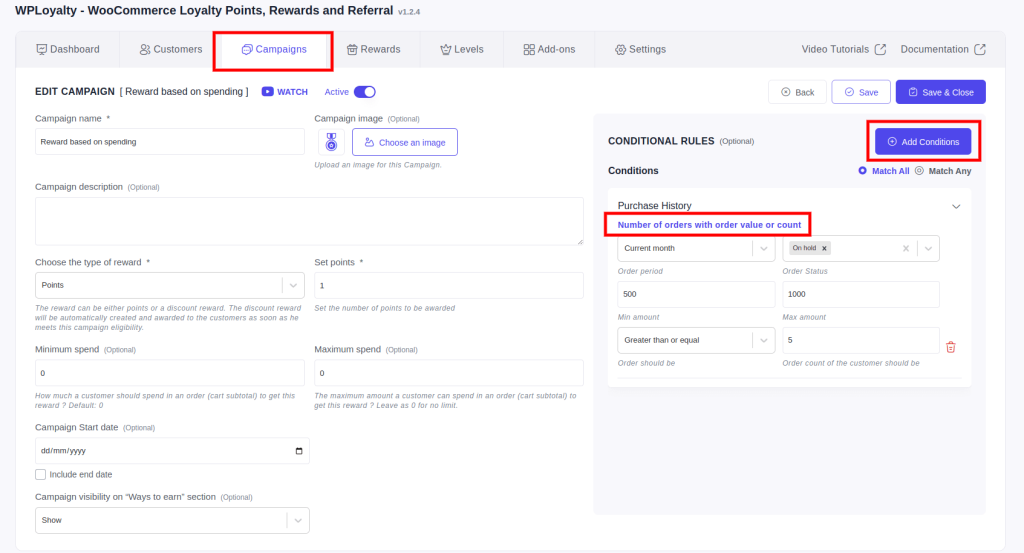
Step 2: Assume that “Order period” is set to “current month,” “Order status” is set to “On hold,” the minimum amount to 500, the maximum amount to 1000, “Order should be” is set to “Greater than or equal,” “Order count of the customer should be” is set to 5.
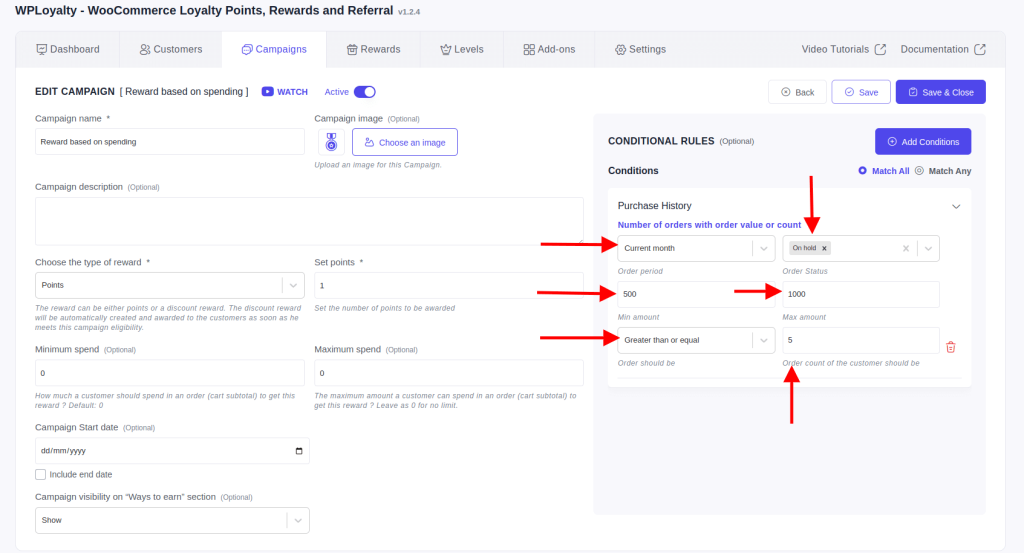
Only eligible customers of these conditions will receive points or coupon rewards from the campaign once all set.
UI IMPROVEMENTS
a) Birthday input field (one-time edit or multiple times)
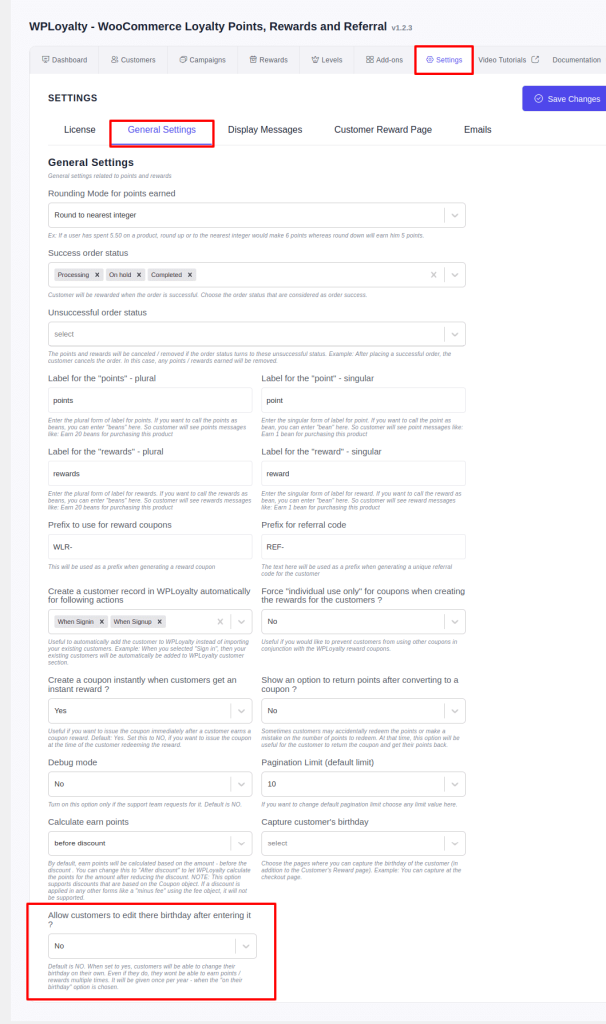
The most awaited update, which allows customers to edit their birthday date only once, is now available on WPLoyalty.
The default setting is NO (customers cannot edit their birthday after entering it). When set to yes, customers can change their birthdays. Even if they change, they can only earn points or rewards once.
b) Common settings for date format
Now, you can set up the date format according to your preferences. To set up the date format, Go to Settings -> General Settings. You can set up or customize the date format under the “Date Format” option.
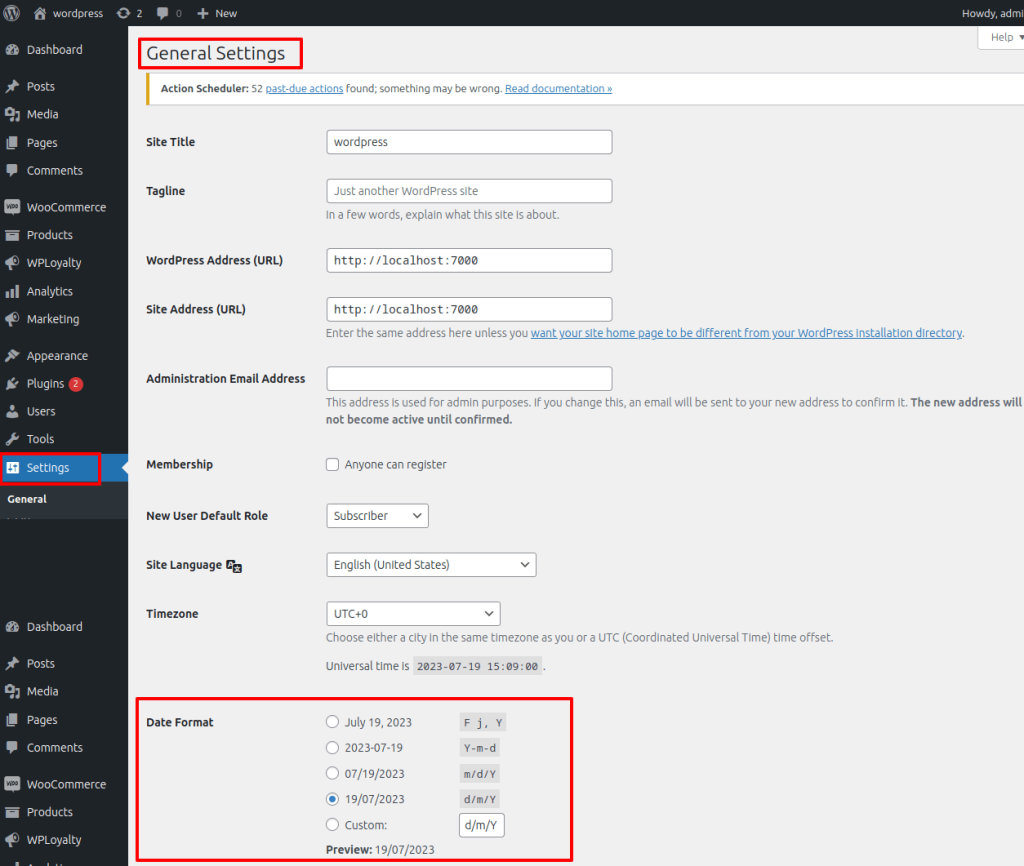
Once all set, your chosen date format is applied all over.
Other notable improvements:
- Attached reference videos for all the Campaigns, Rewards, Levels, Emails, and the Customer screen.
- Implemented level badge to show in “Ways to earn” on the customer reward page.
- Sending reward-earned email with Coupon code.
- Added WooCommerce order notes.