We are excited to announce interesting enhancements to WPLoyalty 1.2.7 – Front Page UI/UX developments, added ban user option, Point earnings with or without tax option, and Launcher visible page.
Front Page UI/UX developments
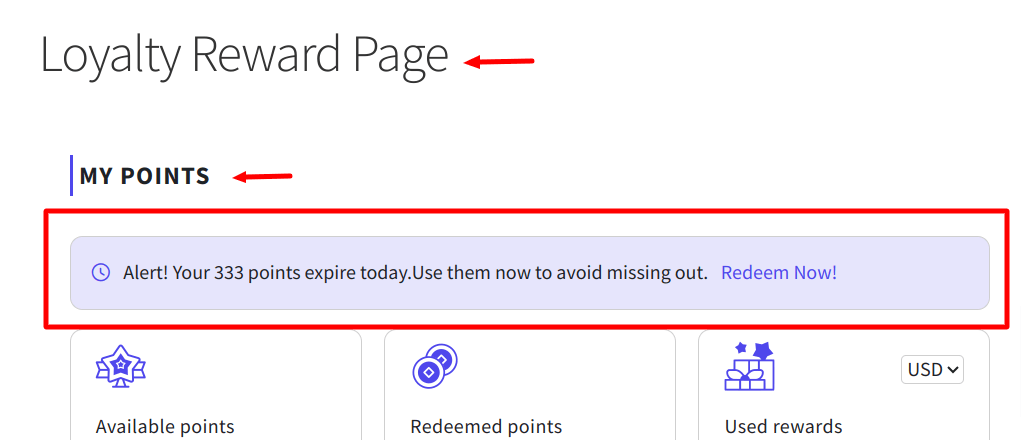
1) We have added the “Used rewards” under the “My Points” section. Here, customers can view the number of used rewards and the value of the rewards used. You can also customize the icons of “Used rewards” in Settings -> Customer Reward Page -> Icon for Used rewards.
Also, we have added “Total points earned” and “Points to coupons” in the “Available points” and ”Redeemed points” segment respectively for easy identification.

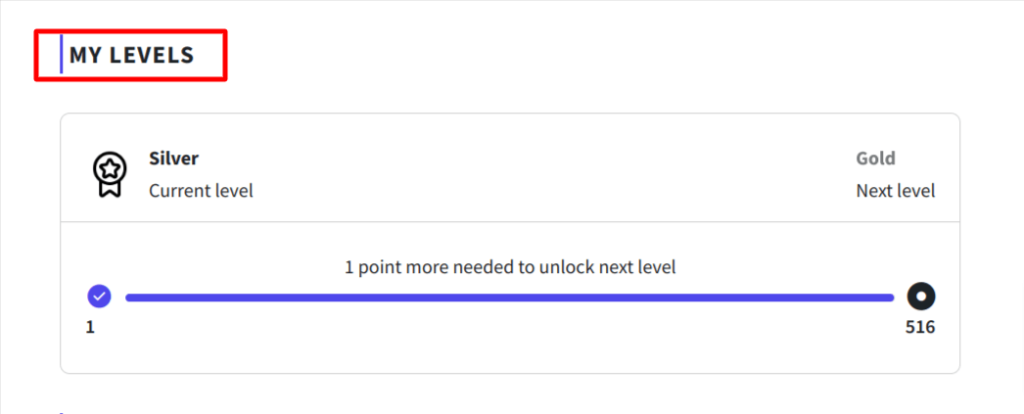
2) We have elaborated the “My levels” section, so that customers can experience enhanced ease of identification and understanding.
3) Customers will now receive an alert message on the day their points are scheduled to expire, informing them to redeem their points.
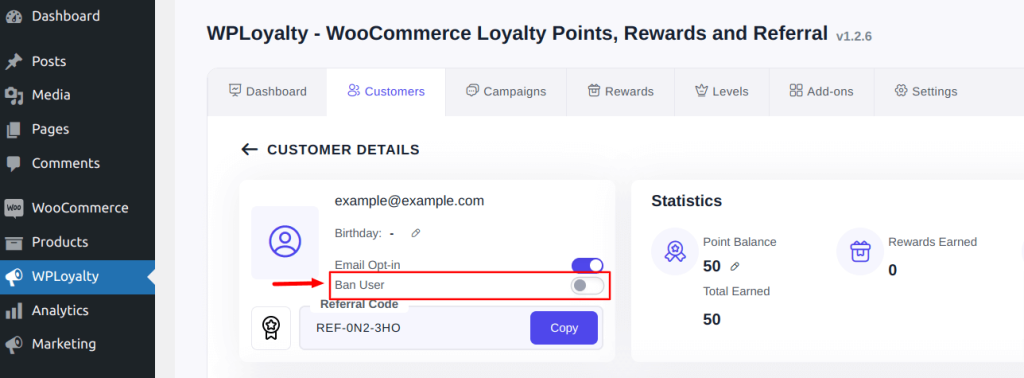
Ban User Option
We have added a new “Ban User” option so that, if necessary, you can restrict loyalty program access for users, ensuring a safer space. To ban a user, Go to WPLoyalty dashboard -> Customers. Select the desired customer profile, and you will have the option to either ban or unban the customer.
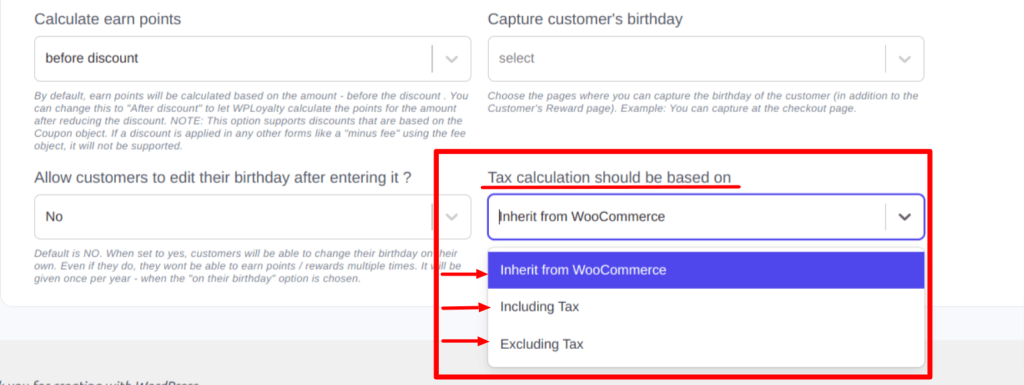
Earned Points Allocation based on Tax Calculation
We have added a new setting enabling you to allocate earning points on the basis of tax calculation. By default, WPLoyalty will inherit the tax settings from WooCommerce. You can also set the “Including tax” or “Excluding Tax” option to specify the earning points with or without tax.
To choose the option, Go to WPLoyalty dashboard -> Settings -> General Settings -> “Tax calculation should be based on.” Now you can choose how the tax calculation should work and save it.
Launcher Widget Visibility
With this new update, you can specify on which pages the launcher widget should appear. It has three conditions: URL’s “Home page,” URL’s “Contains,” and URL’s “Do not contains.”
- If you select the URL’s ‘Home Page” option, the launcher widget will only be displayed on the homepage.
- If you choose the URL’s ‘Contains’ option, you can enter a specific word in the box aside. The launcher widget will then appear wherever there is an exact match for that word in the URL.
- If you choose the URL’s ‘Do not contains’ option, you can enter a specific word in the box aside. The launcher widget will then appear on all pages except those with an exact match of that word in the URL.
To set the launcher widget visibility, Go to WPLoyalty dashboard-> Add-ons. Opt for the Launcher widget add-on. Click Open -> Launcher. Under that you can see “Show widget on specific locations based on conditions”. Select “Add condition” and you can choose the options to specify the launcher widget visibility.
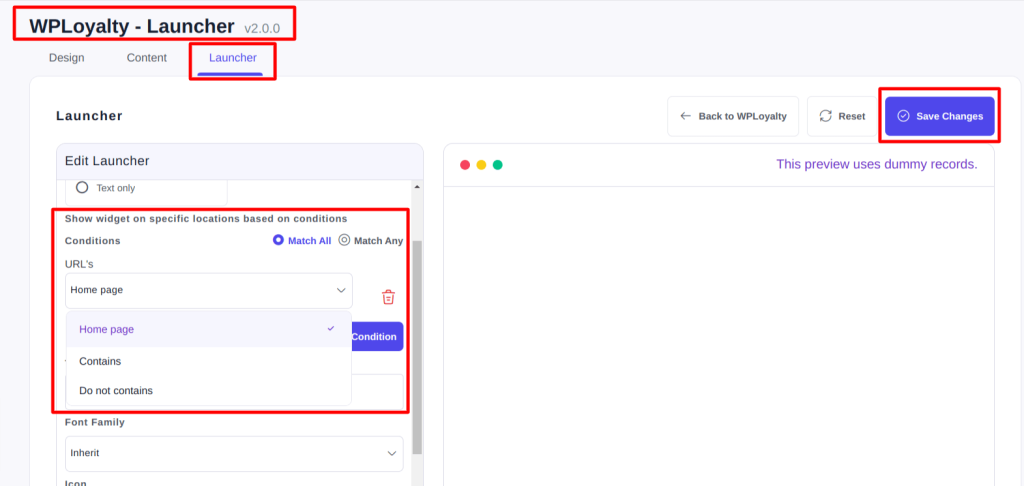
Once all set, the launcher widget will appear on pages based on your conditions.
Other notable improvements:
- The unwanted status has been removed from both successful and unsuccessful order statuses in the general settings.
- Modified the workflow to omit the ‘Enter Birthday’ field when birthday campaigns are not available or inactive.
- Increase in performance due to query optimization in the “write a review” page.
- The workflow has been modified in point expiry add-on, so that new users are now assigned ‘active’ status, and expiry points can be set for them.